I’ve discovered a simple yet transformative technique for cooking chicken that yields incredibly juicy and tender results: brining. This game-changing method has revolutionized my approach to poultry dishes, and I’m excited to share it with you.
By soaking chicken in a salty brine mixture, the meat absorbs moisture and flavor, resulting in a more delicious and tender final product. This recipe works wonders for all cuts of chicken and even turkey, making it a versatile addition to any cook’s repertoire.
With this easy-to-follow chicken brine recipe, you’ll be able to achieve exceptional flavor and texture in your cooked poultry. The best part? It requires minimal effort and can be done in as little as 2 hours.
Key Takeaways
- Brining chicken results in juicier and more tender meat.
- This recipe is versatile and works for various cuts of chicken and turkey.
- The brining process enhances the flavor and texture of the meat.
- Minimal effort is required to achieve maximum results.
- The brine mixture is easy to prepare and can be done in under 2 hours.
Why Brining Your Chicken Makes All the Difference
I’ve discovered that brining chicken is an easy way to ensure that your poultry turns out moist and flavorful. Brining is a simple yet effective technique that involves soaking the chicken in a salt solution before cooking.

The Science Behind Brining
Brining works through the process of osmosis, where the salt water moves into the chicken cells, resulting in juicier meat. The salt in the brine breaks down muscle proteins, allowing the chicken to retain more moisture during cooking.
Benefits of Brined vs. Non-Brined Chicken
Brined chicken is significantly different from non-brined chicken in terms of texture, juiciness, and flavor. Brining creates a buffer against overcooking, giving home cooks more flexibility and confidence when preparing chicken recipes. It also enhances the natural flavor of the chicken while allowing other seasonings to penetrate deeper into the meat, not just the skin.
By brining your chicken, you’re essentially installing a failsafe on your dish. You have more creative control over the flavors throughout the entire muscle meat of your chicken.
My Foolproof Chicken Brine Recipe
My foolproof chicken brine recipe is a game-changer for achieving juicy, tender poultry. This simple yet effective brine recipe can be customized to suit various chicken dishes and cuisines.
Essential Ingredients
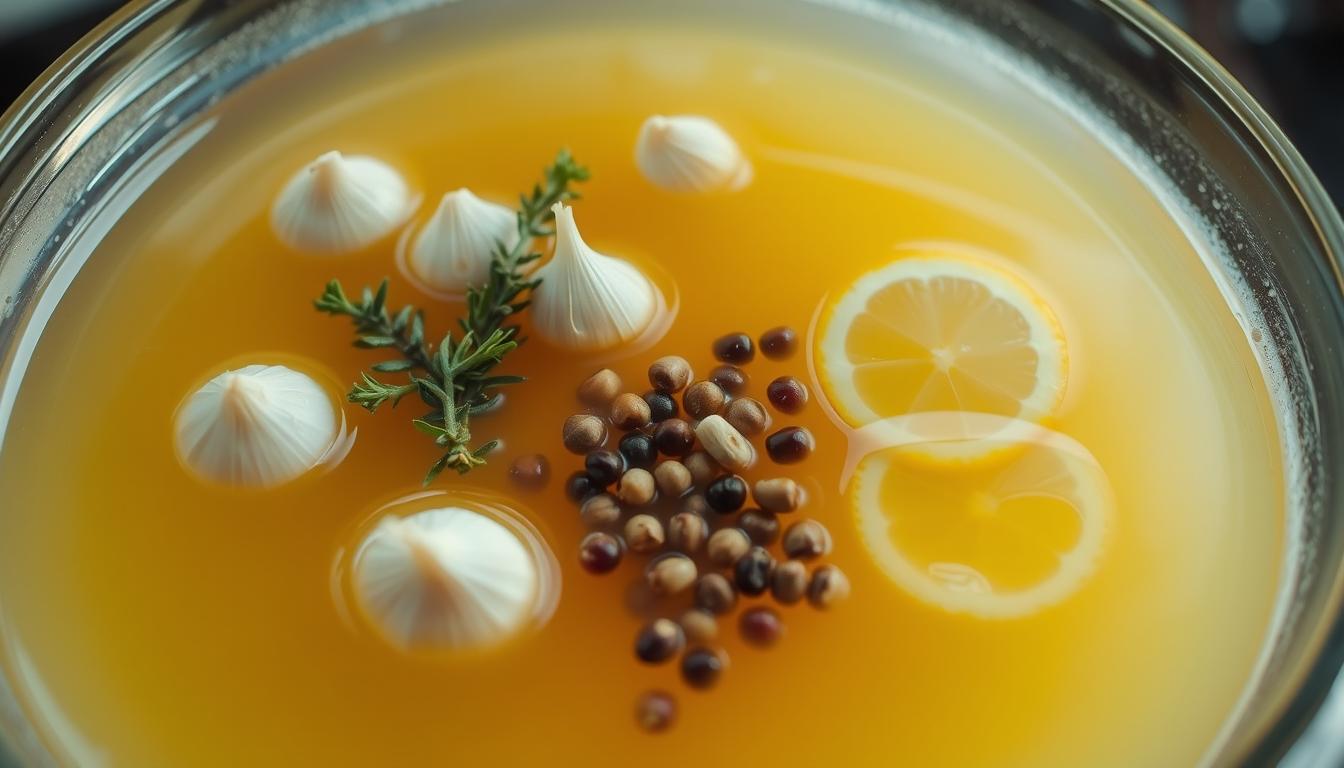
To make my basic chicken brine, you’ll need ½ liter of water (approximately 16 ounces or 2 cups) and 5 tablespoons of kosher salt (100 grams or approximately 3 ounces). I prefer kosher salt over table salt because of its coarser texture and milder flavor. You can also add 3-6 sprigs of fresh herbs (such as rosemary, thyme, or parsley) and 4 large cloves of smashed garlic to enhance the flavor.
Optional Flavor Enhancers
To give your brine an extra boost, consider adding some optional flavor enhancers like sliced onions, lemon coins, bay leaves, or cracked peppercorns. You can also experiment with different cuisines by incorporating ingredients like Italian seasoning, Asian-style ginger, or Southern-style paprika.
Equipment You’ll Need
For successful brining, you’ll need a large container to hold the brine and chicken, a measuring cup, and a spoon for mixing. You can use a stainless steel or plastic container with a lid, making sure it’s large enough to hold the chicken and brine. Don’t forget to have 1 pound of ice on hand to chill the brine before adding the chicken.
 sits prominently. The background features a linen or burlap-like cloth, creating a warm, homey atmosphere. The lighting is soft and natural, with a slight vignette effect to draw the eye to the center of the frame. The overall mood is one of simplicity, quality, and the promise of a delicious, well-brined chicken dish.")
Step-by-Step Brining Instructions
To achieve juicy and tender chicken, follow my step-by-step brining instructions. Brining is a simple process that enhances the flavor and texture of chicken, making it a great technique for any cook to master.
Preparing the Brine Solution
To prepare the brine solution, start by pouring ½ liter of water into a medium saucepan. Add 5 tablespoons of kosher salt, 3-6 sprigs of fresh herbs of your choice, and 4 large cloves of garlic to the saucepan. Stir the mixture quickly to incorporate the ingredients. Place the saucepan on the stovetop over high heat and bring the water to a violent boil. Once boiling, stir until the salt is completely dissolved. Then, move the saucepan to a cool burner, cover it with a lid, and let it stand for 10 minutes. After 10 minutes, carefully pour the brine mixture into a large bowl containing 1 pound of ice. Stir gently until the ice is completely melted.
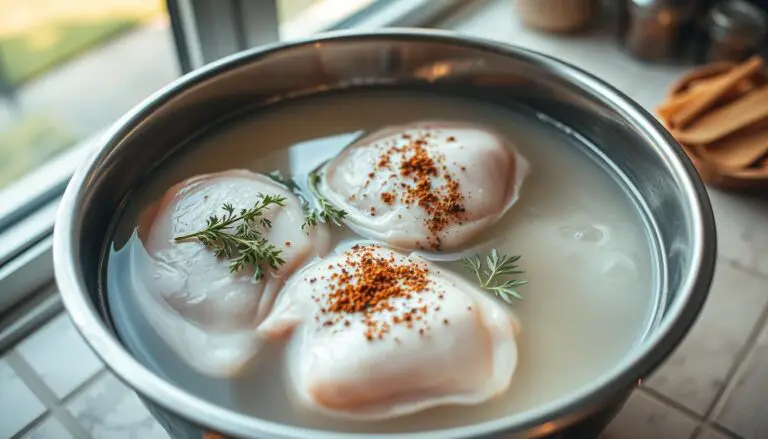
Submerging and Brining Your Chicken
Once the brine has cooled, place a 1-4 pound whole, uncooked chicken in a large container. Carefully pour the cooled brine over the chicken, ensuring that it is entirely submerged. The key to successful brining is making sure the chicken is fully covered by the brine solution.
Removing and Drying the Chicken
After the chicken has brined for the appropriate length of time, remove it from the brine and drain well. Pat the chicken completely dry with paper towels to remove excess moisture, which is crucial for achieving crispy skin when cooking.
- Prepare the brine solution by dissolving salt and flavorings in water.
- Cool the brine solution completely before adding the chicken.
- Submerge the chicken fully in the brine for even flavor distribution.
- Dry the chicken thoroughly after brining to achieve crispy skin.
Brining Times for Different Cuts
The key to perfectly brined chicken lies in understanding the optimal brining times for different cuts. Brining time is crucial because it allows the chicken to absorb the right amount of moisture and flavor. Over-brining can lead to mushy or overly salty chicken, while under-brining might not achieve the desired tenderness.
Whole Chicken Brining Guide
For a whole chicken, the brining time can vary based on its size and whether it’s being brined at room temperature or in the refrigerator. Generally, a whole chicken can be brined for 2 to 3 hours at room temperature or 4 to 6 hours in the fridge.
Chicken Pieces and Parts
When brining chicken pieces such as legs, thighs, and wings, the time can be adjusted based on their size and thickness. Typically, these pieces can be brined for 2 hours at room temperature or 4 hours in the refrigerator.
Boneless, Skinless Chicken Breasts
Boneless, skinless chicken breasts require less brining time due to their smaller size and lack of bones. They can be effectively brined for about 30 minutes at room temperature or 1 hour in the refrigerator.
It’s essential to adjust brining times based on the specific cut and size of the chicken, as well as the brining temperature. Always ensure that the chicken is kept at a safe temperature to avoid bacterial growth.
- Whole Chicken: 2-3 hours at room temperature or 4-6 hours in the fridge.
- Chicken Pieces: 2 hours at room temperature or 4 hours in the refrigerator.
- Boneless, Skinless Chicken Breasts: 30 minutes at room temperature or 1 hour in the refrigerator.
Pro Tips for Perfect Brined Chicken
For restaurant-quality brined chicken, follow these pro tips to ensure juicy, tender poultry. Brining is just the first step; what you do next can make all the difference.
Avoiding Over-Brining
Don’t overdo it – brining for too long can make the chicken overly salty and mushy. Stick to the recommended time for the specific cut of chicken you’re using.
Air-Drying for Crispy Skin
After brining, air-dry the chicken in the fridge to get crispy skin. This step is crucial, especially for fried chicken preparations.
Seasoning After Brining
When seasoning brined chicken, be mindful of the salt content in the brine. Reduce or eliminate additional salt to avoid overly salty chicken.
Storage and Food Safety
Store brined chicken in the refrigerator at a consistent temperature below 40°F (4°C). Use within a day or two for optimal food safety.
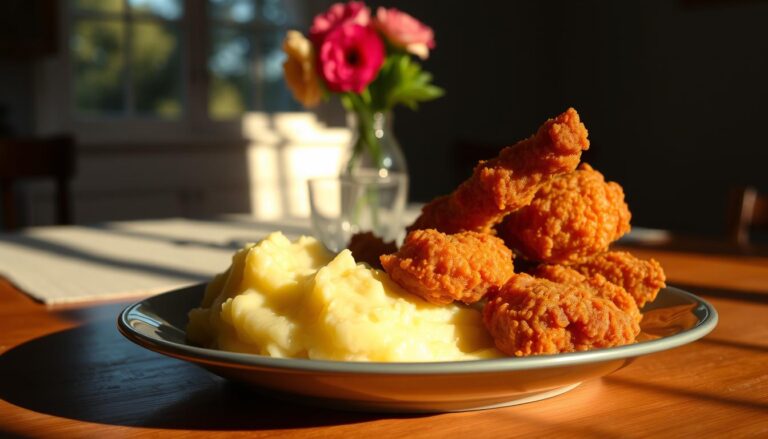
By following these tips, you can achieve perfectly brined chicken with crispy skin and juicy meat, whether you’re making fried chicken or roasting.
Conclusion: Elevate Your Chicken Dishes with Brining
Elevate your chicken dishes with the simple yet powerful technique of brining, and experience the difference for yourself. By using a basic brine recipe, you can achieve juicy, tender chicken in as little as 2 hours. This technique is versatile and can be adapted for different cuts of chicken, turkey, and various cooking methods, including fried chicken.
Experiment with flavors by adding brown sugar, herbs, garlic, and onion to the brine solution. Remember, timing is crucial: avoid over-brining and adjust time based on the cut and size of your chicken or pieces. Brining has revolutionized my cooking, and I’m confident it will elevate your dishes too.